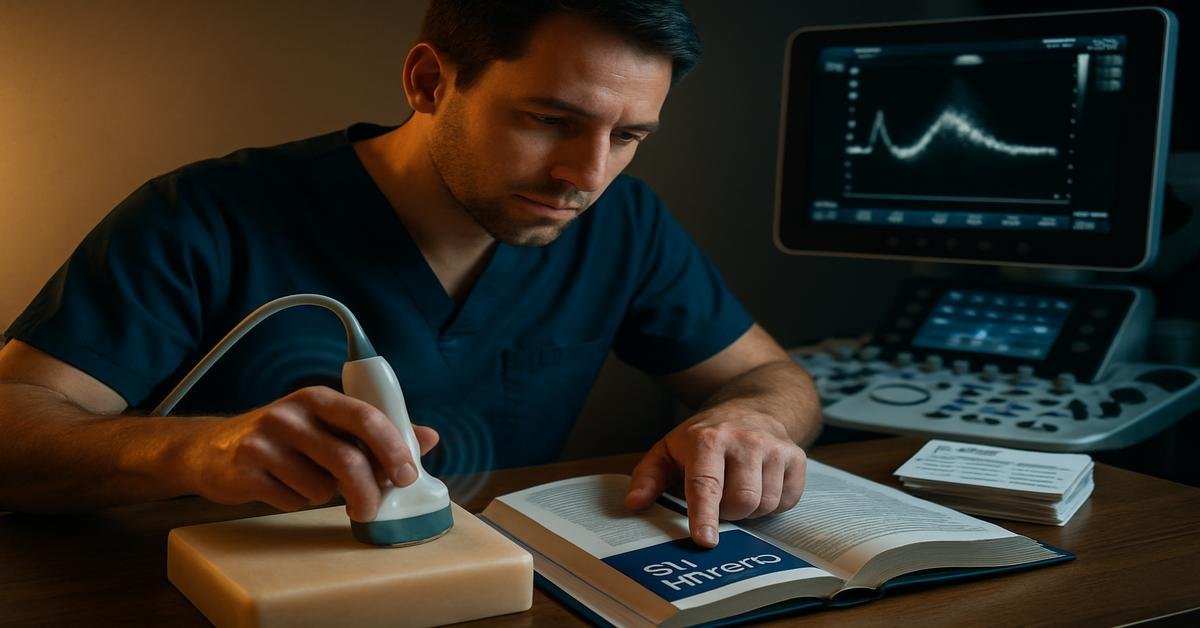
The ARDMS Sonography Principles and Instrumentation exam, usually called the SPI, has a reputation for being the hardest part of the ultrasound credentialing path. For many people, that is not because the material is impossible. It is because SPI physics feels disconnected from daily scanning at first. Terms like attenuation, pulse repetition frequency, damping, and aliasing can sound abstract until you see how they affect the image on the screen. The good news is that SPI physics is learnable when you stop treating it like a list of formulas and start seeing it as a system of cause and effect. If you understand what the machine is sending, what the body does to the sound, and how the system builds an image from returning echoes, the exam becomes far more manageable.
This guide breaks down the core ideas behind sound physics and instrumentation in a practical way. The goal is not just to help you memorize facts. It is to help you understand why each concept matters, how questions are usually framed, and how to think through answers when the wording gets tricky.
Start with the big picture: what SPI is really testing
The SPI exam is not testing whether you can perform algebra under pressure. It is testing whether you understand how ultrasound works as a physical system. That system has three basic parts:
- The machine creates sound pulses.
- The sound travels through tissue and interacts with structures.
- The machine receives echoes and turns them into a useful image or Doppler signal.
Almost every SPI question fits somewhere in that chain. If you can identify which part of the chain the question is asking about, you narrow the answer quickly.
For example:
- If a question asks about frequency, period, power, damping, or bandwidth, it is usually about sound production.
- If it asks about reflection, refraction, attenuation, impedance, or scattering, it is about sound propagation in tissue.
- If it asks about axial resolution, lateral resolution, frame rate, PRF, aliasing, or persistence, it is about image formation or instrumentation.
That mental sorting step saves time and lowers confusion.
Master the core sound physics, not just the definitions
The SPI exam loves to test relationships. That means you need more than definitions. You need to know what changes when one variable goes up or down.
Frequency is the number of cycles per second. In ultrasound, it is set by the transducer and measured in megahertz. Higher frequency gives better detail because shorter wavelengths can separate small structures more clearly. But higher frequency also attenuates more quickly, so it does not penetrate as deeply.
That one tradeoff shows up everywhere in SPI:
- High frequency = better resolution, worse penetration
- Low frequency = worse resolution, better penetration
That is not arbitrary. It happens because tissue absorbs and weakens higher-frequency sound more rapidly.
Period is one cycle duration. It is the inverse of frequency. If frequency increases, period decreases. These inverse relationships are common on the SPI, so it helps to learn them as pairs instead of isolated facts.
Wavelength is the physical length of one cycle. It depends on propagation speed and frequency. In soft tissue, speed is assumed to be about 1540 m/s. Since speed is treated as constant in most exam questions, wavelength mainly changes with frequency. Higher frequency means shorter wavelength. Shorter wavelength improves axial resolution because the pulse can better distinguish two closely spaced reflectors along the beam path.
Amplitude refers to the size of the wave. Larger amplitude means stronger echoes and more energy. This connects to power and intensity. The exam may ask which parameters affect image brightness or bioeffects. If amplitude rises, the strength of the returning echo can increase, making signals stronger.
Power is the rate of energy transfer. Intensity is power spread over area. These are related but not identical. Students often mix them up. If the same power is focused into a smaller area, intensity goes up. That matters because focusing improves detail but also changes beam strength in that focal zone.
Understand how pulses are built and why damping matters
Ultrasound does not send continuous sound in standard imaging. It sends short pulses. That matters because the machine has to listen for returning echoes between transmissions.
A pulse contains a certain number of cycles. The pulse characteristics affect image quality:
- Shorter pulse length improves axial resolution.
- Longer pulse length worsens axial resolution.
Why? Because two reflectors that lie one behind the other can only be seen as separate if the pulse is short enough to distinguish them.
Damping reduces the ringing of the piezoelectric element after it is excited. Strong damping creates shorter pulses. Shorter pulses improve axial resolution. But there is a tradeoff: more damping also reduces sensitivity because the pulse contains fewer cycles and less energy.
This is a favorite SPI concept because it combines physics with instrumentation:
- More damping = shorter pulse length
- Shorter pulse length = better axial resolution
- More damping = broader bandwidth
- Broader bandwidth = better quality for imaging
If you remember only one thing here, remember that damping helps image detail along the beam axis.
Know what happens when sound meets tissue
Once ultrasound enters the body, several things can happen to it. This section is where many SPI questions become more conceptual.
Reflection happens when sound hits a boundary between tissues with different acoustic impedance. More difference in impedance means stronger reflection. This is why bone and air can create very strong echoes and also block deeper structures.
Acoustic impedance is a property of tissue based on density and propagation speed. You do not need to overcomplicate it. For test purposes, just remember this: larger impedance differences at a boundary create stronger reflections.
Scattering occurs when sound strikes small or rough structures and is redirected in many directions. This is useful in Doppler because blood cells are weak scatterers that create the Doppler signal.
Refraction is bending of sound when it crosses a boundary at an angle and the propagation speed differs between the two media. Refraction can create artifacts such as misplaced structures or edge shadowing.
Attenuation is the loss of sound energy as it travels through tissue. It happens due to absorption, scattering, and reflection. In soft tissue, attenuation increases with frequency, which is the reason deeper imaging often requires lower-frequency probes.
If a question asks why a deep structure is poorly seen, think about attenuation first. If it asks why a structure appears in the wrong location, think about speed errors or refraction. If it asks why there is a bright echo at a tissue interface, think reflection.
Resolution is easier when you tie it to beam direction
Resolution means the ability to distinguish two separate objects as separate. The SPI exam tests different types of resolution, and students often confuse them because the names sound similar. The easiest way to keep them straight is by direction.
Axial resolution is along the beam path. It depends on spatial pulse length. Shorter pulses improve axial resolution. This is usually the best kind of resolution in ultrasound.
Lateral resolution is side by side, perpendicular to the beam. It depends on beam width. Narrower beam width improves lateral resolution. Focusing helps here.
Elevational resolution, also called slice-thickness resolution, refers to the beam dimension out of the imaging plane. Poor elevational resolution can make echoes appear within cysts or create partial volume artifacts.
A simple way to remember this:
- Axial = pulse length
- Lateral = beam width in the image plane
- Elevational = beam thickness out of the plane
If the exam asks what improves lateral resolution, think focusing or narrower beam. If it asks what improves axial resolution, think shorter SPL, fewer cycles, or more damping.
Instrumentation questions are really about tradeoffs
The machine controls many settings, and the SPI often asks what each one changes. The easiest way to learn instrumentation is to focus on the tradeoff behind each control.
Gain amplifies returning echoes. It makes the image brighter overall. It does not change the sound sent into the patient. That is why gain affects display, not actual transmitted power.
Output power changes the strength of the transmitted pulse. It affects the amount of energy entering the body. This matters for both image quality and patient safety.
Time gain compensation adjusts amplification by depth. Since deeper echoes are weaker due to attenuation, TGC helps balance brightness from near to far field.
Focusing narrows the beam at a chosen depth. That improves lateral resolution there. But adding more focal zones lowers frame rate because the system must send more pulses per scan line.
Frame rate is how quickly images are refreshed. High frame rate improves temporal resolution, which is important for moving structures. Frame rate improves when you reduce imaging depth, narrow the sector, or use fewer focal zones.
This is a classic SPI pattern:
- Better detail in one area often costs time or coverage.
- More lines, more focal zones, or greater depth usually reduce frame rate.
In other words, instrumentation is full of compromises. The exam expects you to see them.
Doppler is simpler when you think in terms of timing and limits
Doppler physics causes a lot of anxiety, but the exam usually tests a few recurring ideas.
The Doppler shift depends on blood velocity, transmitted frequency, and the angle between the sound beam and blood flow. A higher Doppler angle weakens the measured shift. At 90 degrees, the shift is zero because there is no component of motion toward or away from the transducer.
That is why angle correction matters in vascular studies. The machine needs a realistic estimate of the angle to calculate velocity properly.
Pulsed wave Doppler gives range specificity. You can choose where to sample. But it has a speed limit because of aliasing.
Continuous wave Doppler can measure high velocities without aliasing. But it has no range resolution, so you cannot tell exactly where along the beam the signal came from.
This tradeoff is heavily tested:
- Pulsed wave = precise location, limited high-velocity measurement
- Continuous wave = no aliasing problem, poor location specificity
Aliasing occurs in pulsed Doppler when the Doppler shift exceeds the Nyquist limit, which is half the PRF. On the screen, flow wraps around the baseline. The exam may ask how to reduce it. Common methods include:
- Increase PRF or scale
- Shift the baseline, if available
- Use a lower transmitted frequency
- Use a shallower sample depth if possible
- Switch to continuous wave Doppler
The “why” matters here. PRF is limited by listening time. If the sample volume is deeper, the system must wait longer for echoes to return, so PRF falls. Lower PRF lowers the Nyquist limit, making aliasing more likely.
Artifacts become manageable when you stop memorizing them as random errors
Most artifacts make sense once you understand the machine assumptions. Ultrasound assumes sound travels in a straight line, at 1540 m/s, and echoes return after one reflection directly back to the transducer. Artifacts happen when reality breaks those assumptions.
Reverberation happens when sound bounces back and forth between strong reflectors. The machine interprets delayed echoes as deeper structures, creating repeated lines.
Mirror image is a type of multipath artifact where a strong reflector, such as the diaphragm, makes a structure appear duplicated on the far side.
Acoustic shadowing occurs behind strong attenuators like stone, bone, or calcification. Little sound reaches the deeper tissue, so the area appears dark.
Posterior acoustic enhancement occurs behind weak attenuators, such as fluid-filled structures. More sound continues through, so deeper tissues look brighter.
Side lobe and grating lobe artifacts place echoes in the wrong position because off-axis sound is assumed to come from the main beam. This can create false echoes in cysts.
When learning artifacts, ask one question: which machine assumption failed? That approach is much more reliable than trying to memorize isolated image examples.
Formulas matter, but relationships matter more
You do need some formulas for SPI. But in many questions, you can answer correctly just by knowing whether variables are directly or inversely related.
Examples of high-value relationships:
- Frequency and period are inversely related.
- Frequency and wavelength are inversely related if speed is constant.
- PRF and imaging depth are inversely related.
- Duty factor and listening time are inversely related.
- Intensity is directly related to amplitude squared.
Memorize formulas after you understand the story behind them. For example, PRF drops with depth because the machine must wait longer for returning echoes. That is easier to remember than a formula alone.
How to study SPI physics efficiently
Many candidates waste time rereading notes passively. Physics improves faster when you study actively.
- Group concepts by cause and effect. Example: more damping leads to shorter SPL, which improves axial resolution.
- Use contrast pairs. Example: pulsed wave versus continuous wave, gain versus output power, axial versus lateral resolution.
- Practice explaining concepts out loud. If you can explain aliasing in plain language, you probably understand it well enough for the exam.
- Do question review by topic. Random quizzes are useful later, but early on it is better to master one system at a time.
- Study errors, not just scores. If you miss a question, identify whether the problem was vocabulary, physics relationship, or test wording.
A useful habit is to make a one-line rule for each concept. For example:
- Higher frequency improves detail but loses penetration.
- Shorter pulses improve axial resolution.
- Narrower beams improve lateral resolution.
- More depth lowers PRF and frame rate.
- Pulsed Doppler aliases; continuous wave does not.
These rules help you answer faster under pressure.
How to handle tricky SPI exam questions
SPI questions often include distractors that are partly true but do not answer the exact question. The best strategy is to identify the category first, then the variable, then the relationship.
For example, if a question asks which change improves axial resolution, ignore answers related to beam width or focusing. Those are lateral concepts. If a question asks about a deeper sample volume and aliasing risk, think PRF before anything else.
Also watch for wording like most directly, primary effect, or best answer. Several options may seem connected, but one is closer to the tested mechanism.
When stuck, ask:
- Is this about transmitted sound, tissue interaction, or image processing?
- Is the relationship direct or inverse?
- What tradeoff is being tested?
That simple checklist can rescue a surprising number of questions.
The real secret: learn physics through image behavior
The strongest SPI preparation happens when you connect every physics concept to something visible on the screen. Do not think of attenuation as a textbook term. Think of why the far field gets weaker. Do not think of axial resolution as a definition. Think of whether two close reflectors blur into one. Do not think of aliasing as a formula only. Think of spectral or color flow wrapping because the pulse system hit a timing limit.
That is the real “secret” behind mastering SPI sound physics and instrumentation. You are not memorizing disconnected facts. You are learning how the machine behaves. Once you see the logic, the subject becomes much less intimidating.
The SPI exam is challenging because it rewards understanding, not just recall. But that also means your effort compounds. Each concept you truly understand makes five others easier. Build the subject from first principles, focus on relationships and tradeoffs, and keep asking why the machine behaves the way it does. That is how you move from guessing at physics questions to answering them with confidence.

