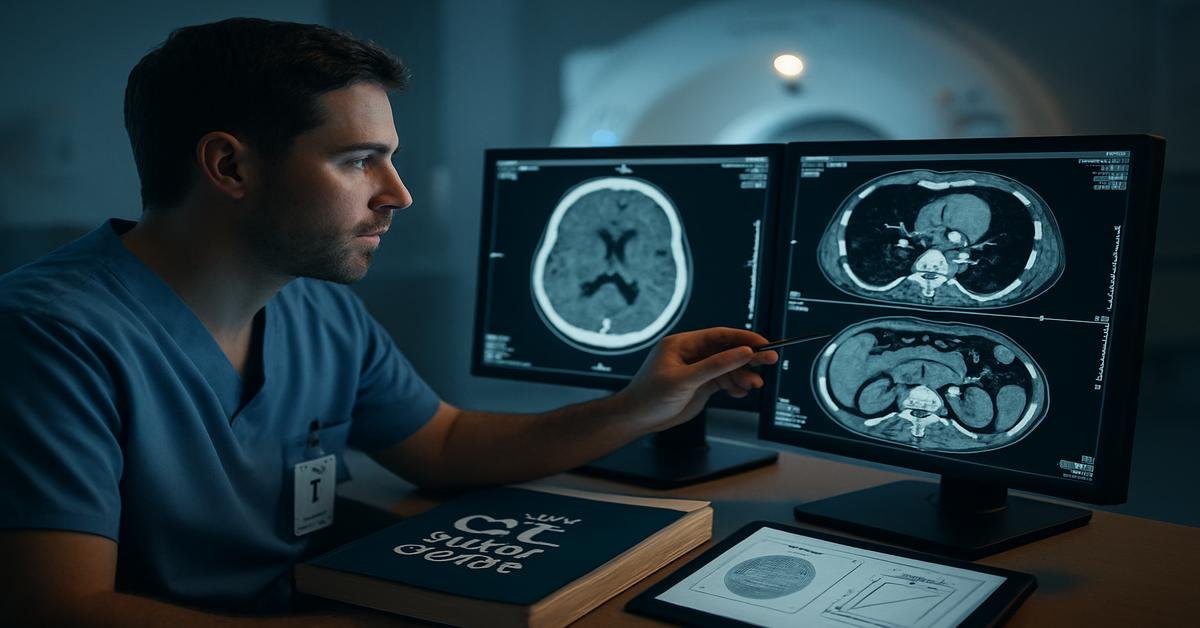
Preparing for the ARRT CT exam can feel broad at first. The content spans patient care, procedures, image production, anatomy, and physics. But most CT technologists know where the pressure really sits: cross-sectional anatomy and CT physics. These are the areas that test whether you can look at an image, understand what you are seeing, and explain why the scanner produced it that way. A good study plan should focus on pattern recognition, core physics principles, and the practical decisions made every day at the scanner. This guide is built around those high-yield topics so you can study smarter and connect exam facts to real clinical work.
What the ARRT CT exam is really testing
The exam does not just ask whether you memorized terms. It tests whether you understand how CT works in practice. That means three things:
- Can you identify anatomy on axial images and in reformatted planes?
- Can you predict how technical factors affect image quality, dose, and artifacts?
- Can you apply protocol logic to common clinical situations?
If you study anatomy as a list and physics as formulas, you will forget both. The stronger approach is to tie every concept to an image and a scanner choice. For example, if slice thickness increases, noise drops because more photons contribute to each image voxel. But small structures may blur because spatial resolution in the z-axis worsens. That is exactly the kind of tradeoff CT questions often expect you to understand.
How to study cross-sectional anatomy efficiently
Cross-sectional anatomy is easier when you stop thinking in textbook chapters and start thinking in levels. CT images are read slice by slice. The exam often works the same way. You need to know what normally appears at a given level and what structures sit next to each other.
A practical method is this:
- Study by body region: head, neck, chest, abdomen, pelvis, spine, and musculoskeletal sections that commonly appear in CT.
- Study by level: for example, chest at the aortic arch, carina, hila, ventricles, and lung bases.
- Study relationships: which vessel is anterior, which organ borders another, where the ureter should be, what sits medial or lateral.
- Use contrast logic: arteries, veins, solid organs, collecting systems, and bowel look different depending on timing.
That last point matters. Anatomy on CT is not always just anatomy. It is anatomy plus phase. A portal venous phase liver image will not look like an arterial phase image. If you ignore timing, normal structures can look unfamiliar.
High-yield head anatomy for CT
Head CT questions often focus on ventricles, cisterns, lobes, basal ganglia, and posterior fossa structures. Start with major landmarks that show up clearly on axial images.
- Lateral ventricles: frontal horns are anterior, occipital horns are posterior, temporal horns extend inferiorly.
- Third ventricle: midline between the thalami.
- Fourth ventricle: between the brainstem and cerebellum.
- Basal ganglia region: caudate nucleus, putamen, globus pallidus, internal capsule, and thalamus are common tested structures.
- Brainstem: midbrain, pons, and medulla.
- Cisterns: especially the suprasellar and quadrigeminal cisterns.
Know the big relationships. The thalami lie on either side of the third ventricle. The pons sits anterior to the fourth ventricle. The cerebellum is posterior in the posterior fossa. The temporal horns of the lateral ventricles help orient you to the temporal lobes.
Also know the difference between gray and white matter on CT. Gray matter is slightly denser than white matter on noncontrast head CT. Loss of gray-white differentiation can indicate early ischemia. Even if the exam does not ask it as a pathology question, it may use that concept to test your basic image interpretation.
High-yield neck and chest anatomy
In the neck, focus on airway, thyroid, salivary glands, major vessels, and muscular compartments. Common high-yield structures include the trachea, esophagus, carotid arteries, internal jugular veins, thyroid gland, parotid glands, submandibular glands, larynx, and cervical vertebrae.
For the chest, learn anatomy by levels. This makes identification much easier.
- Thoracic inlet: trachea, esophagus, thyroid, lung apices, clavicles, and great vessels beginning to appear.
- Aortic arch level: arch position, superior vena cava, trachea, and upper mediastinal structures.
- Carina level: tracheal bifurcation into right and left main bronchi.
- Hilar level: pulmonary arteries and veins, bronchi, hilar nodes if enlarged clinically.
- Cardiac level: chambers of the heart, descending aorta, pericardium.
- Lung bases: diaphragm, lower lobes, liver on the right, spleen on the left.
The chest also brings common vessel questions. The ascending aorta is anterior and to the right before it curves into the arch. The descending aorta is posterior and left-sided in the thorax. The superior vena cava is right-sided and anterior. The esophagus is usually posterior to the trachea and may shift slightly left lower in the chest.
If you learn these positions as a map, exam images become much less intimidating.
High-yield abdomen and pelvis anatomy
The abdomen and pelvis produce many anatomy questions because there are so many structures packed into one region. The best way to study this area is organ by organ, then vessel by vessel, then by spaces and relationships.
Start with the solid organs:
- Liver: right upper quadrant, with hepatic veins draining to the IVC and portal veins centrally branching through the liver.
- Spleen: left upper quadrant, lateral and posterior to the stomach.
- Pancreas: head in the duodenal sweep, body crossing midline, tail toward the spleen.
- Kidneys: retroperitoneal, with the right kidney usually slightly lower because of the liver.
- Adrenal glands: superior to the kidneys, small but commonly tested.
Then focus on the bowel and retroperitoneum:
- Duodenum: especially the C-loop around the pancreatic head.
- Small bowel vs colon: know general location and wall appearance.
- Appendix: off the cecum in the right lower quadrant, though position can vary.
- Ureters: descend retroperitoneally from the renal pelvis to the bladder.
For vessels, know these cold:
- Aorta: left of midline.
- IVC: right of midline.
- Celiac trunk, SMA, and renal arteries: major branches often tested by level.
- Portal vein: formed by the superior mesenteric and splenic veins.
Pelvic anatomy commonly includes the bladder, uterus, ovaries, prostate, seminal vesicles, rectum, iliac vessels, and pelvic bones. Learn what sits anterior and posterior. For example, in the female pelvis, the bladder is anterior, the uterus is usually central, and the rectum is posterior. In the male pelvis, the bladder is anterior, the prostate sits inferior to the bladder, and the rectum remains posterior.
One high-yield detail: the kidneys and adrenal glands are retroperitoneal. So are the pancreas except for the tail, most of the duodenum, the ascending and descending colon, the aorta, and the IVC. Questions often test whether you know where a structure lives, not just what it looks like.
Reformatted imaging and anatomy in other planes
Do not study anatomy only in axial slices. Modern CT relies heavily on sagittal and coronal reformats. The exam may do the same. Coronal images help with the kidneys, ureters, bowel, spine alignment, and sinus anatomy. Sagittal images are especially useful for the spine, sternum, airway, and vascular courses.
If a structure is hard to understand on axial images, ask yourself how it runs through the body. The ureter descends vertically. The pancreas extends transversely. The aortic arch curves. When you understand the three-dimensional path, multiplanar images make more sense.
The CT physics concepts that matter most
CT physics can seem technical, but the exam usually focuses on principles that directly affect the image. A strong foundation comes from understanding attenuation, image formation, acquisition parameters, and dose.
At the center of CT is x-ray attenuation. As x-rays pass through the body, some photons are absorbed or scattered. Dense materials such as bone attenuate more. Air attenuates much less. The scanner measures these differences and reconstructs them into pixels with CT numbers, expressed as Hounsfield units.
- Water: about 0 HU
- Air: about -1000 HU
- Dense bone: high positive values
- Fat: negative values, but not as low as air
This matters because windowing depends on tissue attenuation. Brain images need different window settings than lung or bone because each tissue range is different. If a question asks why anatomy looks washed out or too dark, think about window width and window level before assuming a technical failure.
Key scanning parameters: what changes the image and why
These are the settings you must know because they directly affect image quality, scan speed, and dose.
- kVp: Controls beam energy. Higher kVp increases penetration and usually lowers image contrast. It can help with larger patients but may increase dose depending on the protocol.
- mA or mAs: Controls the number of x-ray photons. Higher mAs reduces quantum noise because more photons reach the detector, but patient dose rises.
- Pitch: In helical CT, pitch reflects table travel relative to beam width per rotation. Higher pitch scans faster and may reduce dose, but too high a pitch can reduce image quality depending on system design and reconstruction.
- Slice thickness: Thicker slices reduce noise because more data are averaged, but they lower spatial resolution and can hide small lesions.
- Rotation time: Shorter rotation helps reduce motion artifact and speeds acquisition, especially useful in trauma or chest imaging.
A common exam pattern is to ask what parameter change would reduce noise. The answer is often to increase mAs or increase slice thickness. But those are not equal choices clinically. More mAs increases dose. Thicker slices may lose detail. The exam likes that kind of tradeoff thinking.
Reconstruction, algorithms, and spatial resolution
Image reconstruction shapes how raw data become a readable CT image. You should know the difference between smooth and sharp reconstruction kernels.
- Smooth algorithms: reduce noise and are useful for soft tissue imaging.
- Sharp algorithms: improve edge detail and spatial resolution, often used for bone or lung, but they increase noise.
This is another tradeoff. You cannot maximize every image property at once. If you increase sharpness, noise becomes more visible. If you smooth the image, fine detail may soften. Understanding this helps with both exam questions and real protocol decisions.
Spatial resolution refers to how well small objects that are close together can be distinguished. It improves with smaller pixels, a smaller focal spot, thinner slices, and sharper algorithms. Contrast resolution refers to the ability to distinguish tissues with small differences in density. CT is especially strong at contrast resolution, but noise can make those subtle differences harder to see.
Radiation dose: high-yield exam points
ARRT expects you to understand dose in practical terms. You do not need to memorize every advanced formula, but you do need the core concepts.
- CTDIvol: indicates scanner output for a protocol.
- DLP: reflects total output over the scan length.
- Effective dose: estimates overall biologic risk, though it is not patient-specific in a strict sense.
Know what raises dose:
- Higher mAs
- Higher kVp in many protocols
- Longer scan length
- Lower pitch in many systems
- Multiple phases
Know how dose is managed:
- Automatic exposure control: adjusts tube current to patient size and attenuation.
- Limit scan range: do not scan beyond the anatomy of interest.
- Use appropriate phases only: avoid unnecessary multiphase studies.
- Match protocol to patient size: pediatric and small adult patients need lower technique.
The exam may frame dose questions around ALARA. The best answer is usually the one that preserves diagnostic quality while reducing unnecessary exposure. Not the lowest possible dose at any cost, but the lowest dose that still answers the clinical question.
Common artifacts and how to recognize them
Artifact questions are often easier if you think in cause-and-effect terms.
- Motion artifact: causes blurring or streaking. Reduced by shorter scan time, better patient instruction, immobilization, or ECG gating in cardiac studies.
- Beam hardening: often seen near dense bone, especially the posterior fossa. Happens because lower-energy photons are absorbed first, changing beam quality.
- Metal artifact: severe streaking from very dense materials such as dental work or hardware.
- Partial volume artifact: occurs when different tissue types are averaged in a voxel, making structures less distinct. Thinner slices help.
- Ring artifact: usually related to detector calibration issues.
If a question asks why a tiny lesion disappeared on thicker images, think partial volume averaging. If posterior fossa images are streaky, think beam hardening. If the whole image has circular bands, think detector-related ring artifact.
How to connect anatomy and physics on exam day
The strongest CT technologists do not separate anatomy from physics. They connect them. For example:
- If you need to see a small pancreatic lesion, thinner slices may help because they reduce partial volume averaging.
- If a patient cannot hold still, faster acquisition and shorter rotation time may reduce motion artifact.
- If you are evaluating the lungs, a sharp algorithm can improve edge detail, but noise will increase.
- If you are reviewing brain CT, proper windowing is essential to see subtle differences between gray and white matter.
That is exactly how many ARRT questions are built. They describe a clinical need, then ask which technical choice best supports it.
A practical last-week study plan
If your exam is close, focus on active recall, not passive reading.
- Day 1–2: Head, neck, and chest anatomy by image level.
- Day 3–4: Abdomen and pelvis anatomy, vessels, and retroperitoneal structures.
- Day 5: Physics fundamentals: attenuation, HU, kVp, mAs, pitch, slice thickness, reconstruction.
- Day 6: Dose, artifacts, and protocol logic.
- Day 7: Mixed question review and weak areas only.
Quiz yourself using unlabeled images. Cover labels and identify structures by relationship. Ask yourself what lies anterior, posterior, medial, or lateral. For physics, make short scenario cards. Example: “Need less noise.” Then list two ways to achieve it and what each tradeoff would be.
That style of studying is effective because the exam is not just memory-based. It is decision-based.
Final takeaway
For the ARRT CT exam, high-yield studying means mastering two linked skills: reading anatomy in cross section and understanding why CT images look the way they do. If you know the normal map of the body and the key physics choices behind image quality, many exam questions become more straightforward. Study by image level, by relationships, and by cause and effect. That approach is closer to real CT practice, and it is usually the fastest route to a strong exam score.