The NHA Certified EKG Technician (CET) exam rewards techs who understand not just where stickers go, but why the heart’s electrical signals look the way they do. If you can think in vectors, place leads precisely, measure with discipline, and spot errors fast, you will perform well in the exam and on the job. This guide covers heart rhythms, lead placement, interpretation basics, and the workflow you’ll need to master for the 2026 CET exam.
What the NHA CET Exam Expects in 2026
The CET exam tests three core abilities: safe practice, accurate acquisition, and competent analysis. That means you must be able to:
- Protect the patient: verify identity, obtain consent, use the right PPE, and respond to urgent changes.
- Acquire clean tracings: prepare skin well, place leads with anatomical accuracy, set the correct speed and gain, and troubleshoot artifacts.
- Analyze with basics: measure rate and intervals, recognize common rhythms and blocks, identify ischemic patterns, and know when special leads are needed.
Expect scenario-based questions. They ask what you would do next when a lead is reversed, a rhythm is unstable, or a patient becomes symptomatic. They also test documentation and patient education. Memorization helps, but understanding the “why” earns points and prevents mistakes.
Core EKG Physics and Lead Logic You Must Know
EKG waves are vectors. When electrical flow moves toward a lead’s positive electrode, the waveform goes up. When it moves away, the waveform goes down. This is why the same heartbeat can look different across leads.
- Einthoven’s triangle: Leads I, II, III connect the arms and left leg. They “see” different angles of the same beat.
- Augmented leads: aVR, aVL, aVF look from the right arm, left arm, and left leg respectively, using the body as a reference. aVR is normally negative because the heart’s main vector points away from the right shoulder.
- Precordial leads (V1–V6): lie across the chest and “watch” the heart in the horizontal plane. They track septal to lateral activation, explaining normal R-wave progression from V1 to V6.
- Standard settings: speed 25 mm/s and gain 10 mm/mV. You need these to measure intervals correctly and compare tracings. If the gain is wrong, amplitudes lie; if speed is wrong, intervals lie.
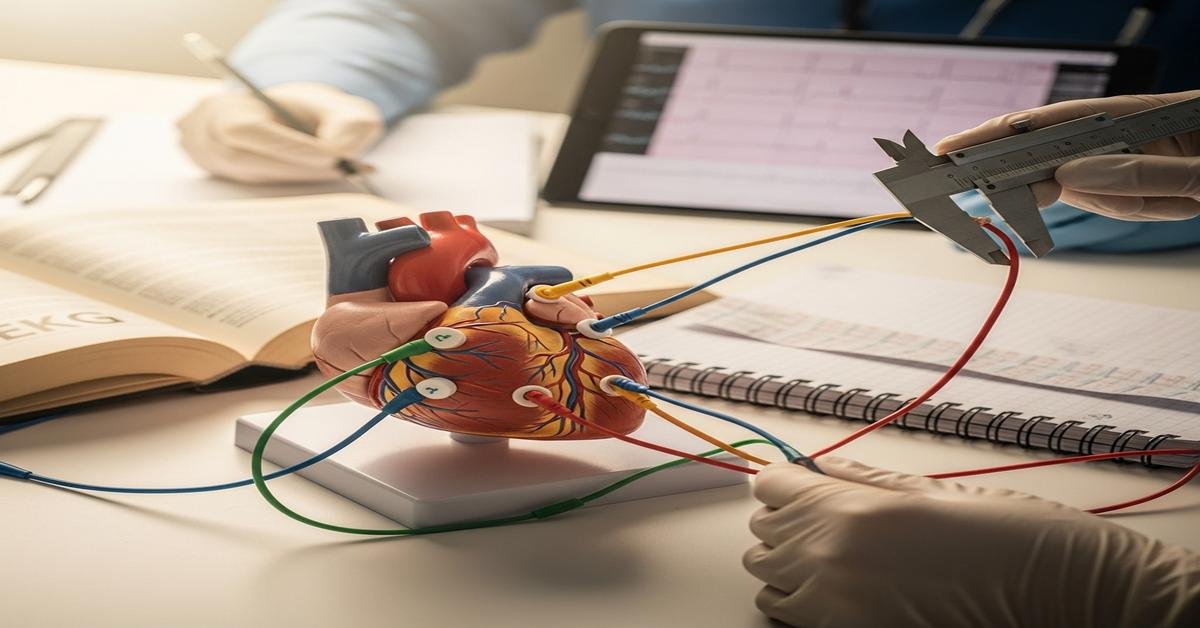
Exact 12‑Lead and Limb Lead Placement (and Why It Matters)
Precise placement prevents false diagnoses. A misplaced lead can mimic ischemia, hypertrophy, or bundle branch block. That costs patients and fails exams.
Limb electrodes (limb leads can be on limbs or torso if necessary):
- RA: right forearm or upper arm (avoid bony prominences).
- LA: left forearm or upper arm.
- RL: right lower leg (ground; affects noise, not morphology).
- LL: left lower leg.
- Torso placement option: for tremors or pediatric patients, place RA/LA just below the clavicles and RL/LL lower abdomen, lateral to the umbilicus. Be consistent and document.
Precordial electrodes (always use intercostal spaces, not “by eye”):
- V1: 4th intercostal space (ICS), right sternal border.
- V2: 4th ICS, left sternal border.
- V4: 5th ICS, midclavicular line.
- V3: midway between V2 and V4.
- V5: level with V4, anterior axillary line.
- V6: level with V4, midaxillary line.
Why exact placement matters: V1 and V2 too high or low change R-wave progression and ST segments. V4 too medial or lateral changes Q-wave appearance. Errors can falsely suggest anterior MI or bundle branch block.
Common lead reversal clues:
- RA/LA reversal: Lead I becomes negative (inverted P, QRS, T). aVR becomes positive. Chest leads look normal. Stop and correct.
- RL misplacement: increased noise because ground is poor; morphology usually unchanged.
Skin Preparation and Signal Quality
Good skin prep decreases impedance so the EKG records heart signals, not static. It prevents wandering baselines and AC interference.
- Explain the procedure and get consent. Anxiety causes muscle artifact.
- Shave hair where electrodes go. Hair lifts electrodes, creating noise.
- Clean with alcohol and let dry. Oil and lotion insulate the skin.
- Lightly abrade with gauze or prep pad until the skin is pink, not raw. This removes dead skin cells that block conduction.
- Press electrodes firmly for full gel contact. Replace dry or expired electrodes.
Recognizing and Fixing Artifacts
Artifacts hide true rhythms and can trigger wrong calls. Identify the pattern and fix the cause.
- Wandering baseline: slow drift up and down. Causes: loose electrodes, breathing, poor skin prep. Fix prep and cable tension; ask patient to breathe normally.
- Somatic tremor: jagged, fast squiggles. Causes: shivering, anxiety, Parkinson’s. Warm the patient, support arms/legs, use torso limb leads if needed.
- AC interference (60 Hz): uniform, rapid, thickened baseline. Causes: nearby electronics, power cords, poor grounding. Move cords, unplug nonessential devices, ensure RL contact, avoid crossing lead wires.
- Loose lead: sudden large swings or flatline in one lead. Reattach and replace the electrode.
- Broken wire: intermittent dropouts. Swap the cable.
Measuring Rate, Intervals, and Segments
Measurement proves what you see. Do not “eyeball” under exam pressure.
- Rate (regular rhythms): large box method: 300, 150, 100, 75, 60, 50 counting between R waves.
- Rate (irregular or strips): 6-second method: count QRS in 30 large boxes and multiply by 10.
- PR interval: start of P to start of QRS, normal 0.12–0.20 s (3–5 small boxes). Prolonged suggests AV nodal delay or medication effects.
- QRS duration: onset to end of QRS, normal up to 0.10–0.12 s. Wider implies bundle branch block or ventricular origin.
- QT: start of QRS to end of T. Adjust for rate (QTc). Prolonged QT increases torsades risk; many drugs and electrolyte issues can prolong it.
- ST segment: measured from the J-point. Elevation or depression ≥1 mm in limb leads or ≥2 mm in chest leads can be significant when contiguous.
Rhythm Identification: From Normal to Life-Threatening
Know the hallmarks and the reason they happen. That makes them easier to remember.
- Normal sinus rhythm: regular, rate 60–100, upright P in II, each P followed by QRS. SA node is pacing normally.
- Sinus bradycardia: same as NSR, rate <60. Common with athletes, sleep, beta-blockers. Watch for symptoms.
- Sinus tachycardia: rate >100, gradual onset/offset. Body is compensating for stress, fever, shock, or pain.
- Atrial fibrillation: irregularly irregular, no distinct P waves, fibrillatory baseline. Chaotic atrial activity produces variable AV conduction.
- Atrial flutter: “sawtooth” flutter waves, often 2:1 or 4:1 conduction. Reentrant circuit in the atria drives rapid activity.
- SVT (AVNRT/AVRT): very regular, narrow QRS, rate often 150–220, P waves hidden or retrograde. Reentry above the ventricles.
- Junctional rhythms: narrow QRS with absent or inverted P, rate 40–60. AV junction takes over when SA node fails.
- First-degree AV block: PR >0.20, all P conducted. Delayed AV nodal conduction, often benign.
- Second-degree AV block Mobitz I (Wenckebach): PR prolongs progressively, then a drop. AV node tires with each beat.
- Second-degree AV block Mobitz II: constant PR with dropped QRS. More serious; block is below the AV node.
- Third-degree (complete) block: P and QRS dissociated. Atrial and ventricular rhythms march independently.
- PVCs: early, wide, bizarre QRS without a preceding P; compensatory pause. Ventricular focus fires early.
- Ventricular tachycardia: wide, fast, usually regular; AV dissociation possible. Life-threatening; check patient first.
- Ventricular fibrillation: chaotic, no identifiable QRS. No cardiac output; initiate emergency response.
- Asystole: flatline; confirm in two leads and check equipment. Start ACLS protocols if appropriate.
- Pacemaker rhythms: spikes before P or QRS depending on chamber paced; capture produces expected waveform.
Bundle Branch Blocks and Hypertrophy Patterns
Bundle blocks change depolarization sequencing, widening the QRS.
- Right bundle branch block (RBBB): QRS ≥0.12 s, rsR’ “rabbit ears” in V1–V2, wide S in I, V5–V6. Right ventricle depolarizes late.
- Left bundle branch block (LBBB): QRS ≥0.12 s, broad/notched R in I, V5–V6; deep QS or rS in V1. Left ventricle depolarizes late; ST analysis for ischemia becomes unreliable.
- LVH: very tall R in V5–V6 and deep S in V1–V2; strain pattern with ST depression/T inversion laterally. Thick muscle makes bigger voltages.
Axis quick-check: Lead I and aVF. Both positive = normal. I positive and aVF negative = left axis. I negative and aVF positive = right axis. Both negative = extreme axis. Axis shifts often reflect conduction blocks or hypertrophy.
Ischemia and Infarction Basics for Techs
Ischemia affects ST segments and T waves; infarction adds Q waves. You must think in contiguous lead groups because coronary territories have neighborhoods.
- Ischemia: ST depression and/or T-wave inversion in contiguous leads.
- Injury (acute): ST elevation in contiguous leads. Look for reciprocal depression.
- Q waves: pathologic when wide and deep in matching leads; indicate prior infarction.
- Lead groups:
- Inferior: II, III, aVF
- Anterior: V1–V4
- Lateral: I, aVL, V5–V6
- Septal: V1–V2
- Right ventricular infarct: suspect with inferior MI and hypotension. Confirm with V4R (mirror V4 on the right).
- Posterior infarct: suspect with horizontal ST depression and tall R in V1–V2. Confirm with posterior leads V7–V9 (left posterior axillary to paraspinal line, level with V6).
Special Populations and Alternate Lead Sets
- Dextrocardia: global negativity in lead I and reversed R-wave progression. Place right-sided chest leads (V1R–V6R) mirroring standard positions. Limb leads may also need right-sided adjustments; document clearly.
- Pediatrics: use smaller electrodes, torso limb placement to reduce motion, and distraction. Heart rates and intervals differ by age; focus on acquisition quality.
- Bariatric patients: find the correct intercostal spaces with firm palpation; lift tissue gently to avoid misplacement.
- Pregnancy: avoid supine hypotension by slight left lateral tilt if dizzy; lead positions stay the same.
- Amputees or wounds: place limb electrodes proximally on the torso in the same relative positions; document.
Holter, Telemetry, and Stress Test Basics
Holter monitors: continuous 24–48 hour recording. Your job is placement, education, and quality control.
- Prep skin well. Torso limb leads reduce motion artifact.
- Teach patients to keep a diary with time, symptoms, and activity. This links symptoms to rhythms.
- Advise: keep device dry (unless approved), avoid magnets, secure leads, and do usual activities unless told otherwise.
Event monitors: patient-triggered or auto-detected; teach how to activate during symptoms.
Telemetry: continuous in-hospital monitoring. Check electrodes daily, label channels, and respond to alarms quickly. Alarms reflect patient first, then equipment.
Exercise stress testing: techs often prep leads, monitor vitals, and watch the tracing. Know basics:
- Stop criteria include significant ST changes, concerning arrhythmias, drop in blood pressure with exertion, severe chest pain, or severe dyspnea.
- Document RPE (perceived exertion), stage, speed/incline, and any symptoms at each stage.
Safety, Ethics, and Professional Practice
- Identify the patient: use two identifiers (name and DOB). Label the tracing before recording to avoid mix-ups.
- Consent and privacy: explain the test, expose only as needed, and drape appropriately. Protect the patient’s information.
- When to act: new chest pain, severe shortness of breath, syncope, hypotension, sustained VT, or heart block with instability. Call for help per protocol.
- Infection control: hand hygiene, clean equipment, single-use electrodes, and gloves for skin prep.
- Documentation: record date/time, your name/credentials, patient position, lead placement variations, speed/gain, patient symptoms, and any events during acquisition.
Exam-Day Strategies and Practice Plan
Drills that build speed and accuracy:
- Lead placement reps: practice on classmates or mannequins until you can place V1–V6 by palpation without looking at a chart.
- Artifact hunts: look at sample strips and name the artifact and fix in under 10 seconds.
- Interval sprints: set a timer and measure PR, QRS, QT on five strips. Check against answer keys.
- Rhythm triage: categorize as stable benign, needs monitoring, or emergent. Back up your call with one defining feature (e.g., “irregularly irregular, no P waves = AF”).
- Axis in 5 seconds: check I and aVF; say the axis out loud.
Memory anchors:
- V1 and V2 at the 4th ICS; V4 at 5th ICS MCL; V5 and V6 are level with V4.
- PR 0.12–0.20; QRS up to ~0.10–0.12; QTc prolonged increases risk.
- RA/LA reversal = negative lead I and positive aVR.
- RBBB = rabbit ears in V1; LBBB = broad R in lateral leads.
- Ischemia/injury needs contiguous leads; think neighborhoods.
Test-taking tips:
- Answer what they asked, not what you assume. If they ask “what’s next,” choose the action that improves safety or data quality.
- If a tracing looks impossible physiologically, think lead reversal or gain/speed error.
- Use process of elimination: discard choices that violate safety, scope, or physiology.
Quick Checklist Before You Hit Print
- Two patient identifiers confirmed; order verified.
- Skin prepped; fresh electrodes; cables untangled.
- Limb and precordial leads placed at exact landmarks.
- Speed 25 mm/s; gain 10 mm/mV; filter set appropriately.
- Patient comfortable, warm, and still; normal breathing.
- Preview for artifact; re-record if needed.
- Document position, variations, symptoms, and your initials.
- Provide copy to the chart and notify per protocol if critical findings are seen.
Putting It All Together: Why This Approach Works
Lead placement accuracy prevents false patterns. Good prep yields clean signals. Measuring intervals verifies rhythm calls. Understanding vectors and contiguous leads makes ischemia patterns make sense. Recognizing artifacts protects patients from misdiagnosis. Practicing these steps builds habits you can trust during the exam and at the bedside. The CET credential confirms you can do this work reliably. Master the fundamentals above, and you’ll be ready for the 2026 exam and real-world EKG acquisition and analysis.

